


Find your Happily Ever After with these Bride and Groom Cookie Stencils with Matching Cutters from Confection Couture.
What can you I use to stencil cookies?
Whether it’s airbrushing or using royal icing, Confection Couture has everything you need to stencil the perfectly beautiful and whimsical cookie! This includes an incredible selection of stencil designs for all occasions, airbrush systems, colorants, and accessories.
What kind of icing do you use for cookie stencils?
Royal Icing works best for either coloring and creating the stencil itself or for creating a perfect surface onto which to airbrush your stenciled design.
Can you airbrush cookies?
It’s easy to create beautiful designs on cookies or cakes using our incredible selection of stencils and accessories!
What do you need to airbrush cookies?
Confection Couture has everything you need to create whimsical designs on your cookies or cakes for any occasion!
What is the easiest way to decorate cookies?
Using stencils, in conjunction with either airbrushing or royal icing, is a super easy way to create exciting themed cookies for any holiday or celebration or just for the fun of it!
Here's what you'll need:

- She Said Yes Cookie Stencil
- Team Groom Cookie Stencil
- AirGenie Airbrush System
- Gyro-Cut Craft and Hobby Cutting Tool
- Cookie Magnets
- Quadrant Masking Tool (x2)
- Stencil Genie
- Screen Genie
- DecoPac Airbrush Food Coloring
- Bronze Shimmer
- Silver Shimmer
- Petal Pink
- Midnight Black
- Malibu Blue
- Sugar Cookie ingredients
- Royal Icing ingredients
- Glad Press'n Seal
- Paper Towels
The first step, of course, is to bake your cookies and cover them with royal icing.
Bride Cookies and Masking


To isolate individual design elements, cover the stencil with Glad Press'n Seal and remove any bubbles or wrinkles.
Use a Gyro-Cut Craft and Hobby Cutting Tool to trim and lift the corner the plastic covering the upper and lower part of the wedding dress design.
Peel away the trimmed portion, leaving everything else covered.
Stencil Tools

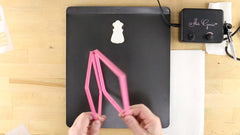


Next, take your Stencil Genie and separate the upper and lower portions.
Place the thicker side down, magnets facing up, and center the chosen stencil design in the center.
Add a Quadrant Masking Tool to the opposite corner before replacing the remaining piece of the Stencil Genie.
Stenciling


After placing the apparatus over the cookie, place some cookie magnets on either side of the design to aid in holding the stencil flat against the cookie's surface.
Load your AirGenie airbrush tool reservoir with 5-6 drops of DecoPac Silver Shimmer airbrush colorant.
Use a long needle or chopstick to hold down any areas of the stencil that are still not flat against the cookie as you airbrush.
Apply the color in light coats using a small, circular motion.
Once finished, remove the stencil apparatus and place your cookie aside to dry.


Repeat the process for the diamond element of the "She said yes" design.
Petal Pink and Bronze Shimmer


Use Petal Pink to airbrush the heart elements of wedding dress and the "Bride tribe" designs.
Midnight Black


After airbrushing the ribbon, laurel, flourish, and ring elements in Bronze Shimmer, switch to Midnight Black for the clothes hanger design.


Use black to complete all of the text on the remaining three cookies.
Groom Cookies


Now it's time to stencil the Groom cookies.
Use a Quadrant Masking Tool to cover the bowtie element while leaving the text of the first design unmasked.
Airbrush as you did earlier, with the Midnight Black colorant still loaded in the airbrush tool.


Proceed with all remaining elements that will be airbrushed in black: the "team GROOM" text and the tuxedo and suit designs.
Malibu Blue


For the remaining bowtie elements, load some Malibu Blue (or whatever color you choose) and go to town!


Your Bride and Groom cookies are now complete and ready to celebrate!
For more tips and ideas, visit ConfectionCoutureStencils.com today.